

What is THE Google Conversion tag?
Google's Conversion Tracking Tag is a piece of code added to your Promotion Page that collects data from visitors that land on this page. This code snippet allows you to track and understand the actions users take on your Promo Page to build and target the right audience for your re-engagement strategies through Google or YouTube ads.
Summary
Click on one of the topics below to learn more:
What data does the Google Conversion tag collect?
The Google Conversion Tag will collect the following information from your Promo Page visitors:
Anything present in HTTP headers:
IP addresses, information about the web browser, page location, document, referrer and person using the website.
Button click data:
Any buttons clicked by visitors (i.e. clicks on theTrack button, Tickets button, RSVP buttons, Request a Show button, etc.), the labels of those buttons and any pages visited due to button clicks.
Additional custom data (not default, optional):
Examples of custom data events include adding a conversion value, page type, etc., to default events.
Creating a Google Conversion tag:
Note: These instructions assume that you already have a Google Ads account.
Step 1

From your Google Ads account, click on Tools & Settings and, under Measurement, click on Conversions.
Step 2

Click on the + button to create a new conversion action.
Step 3
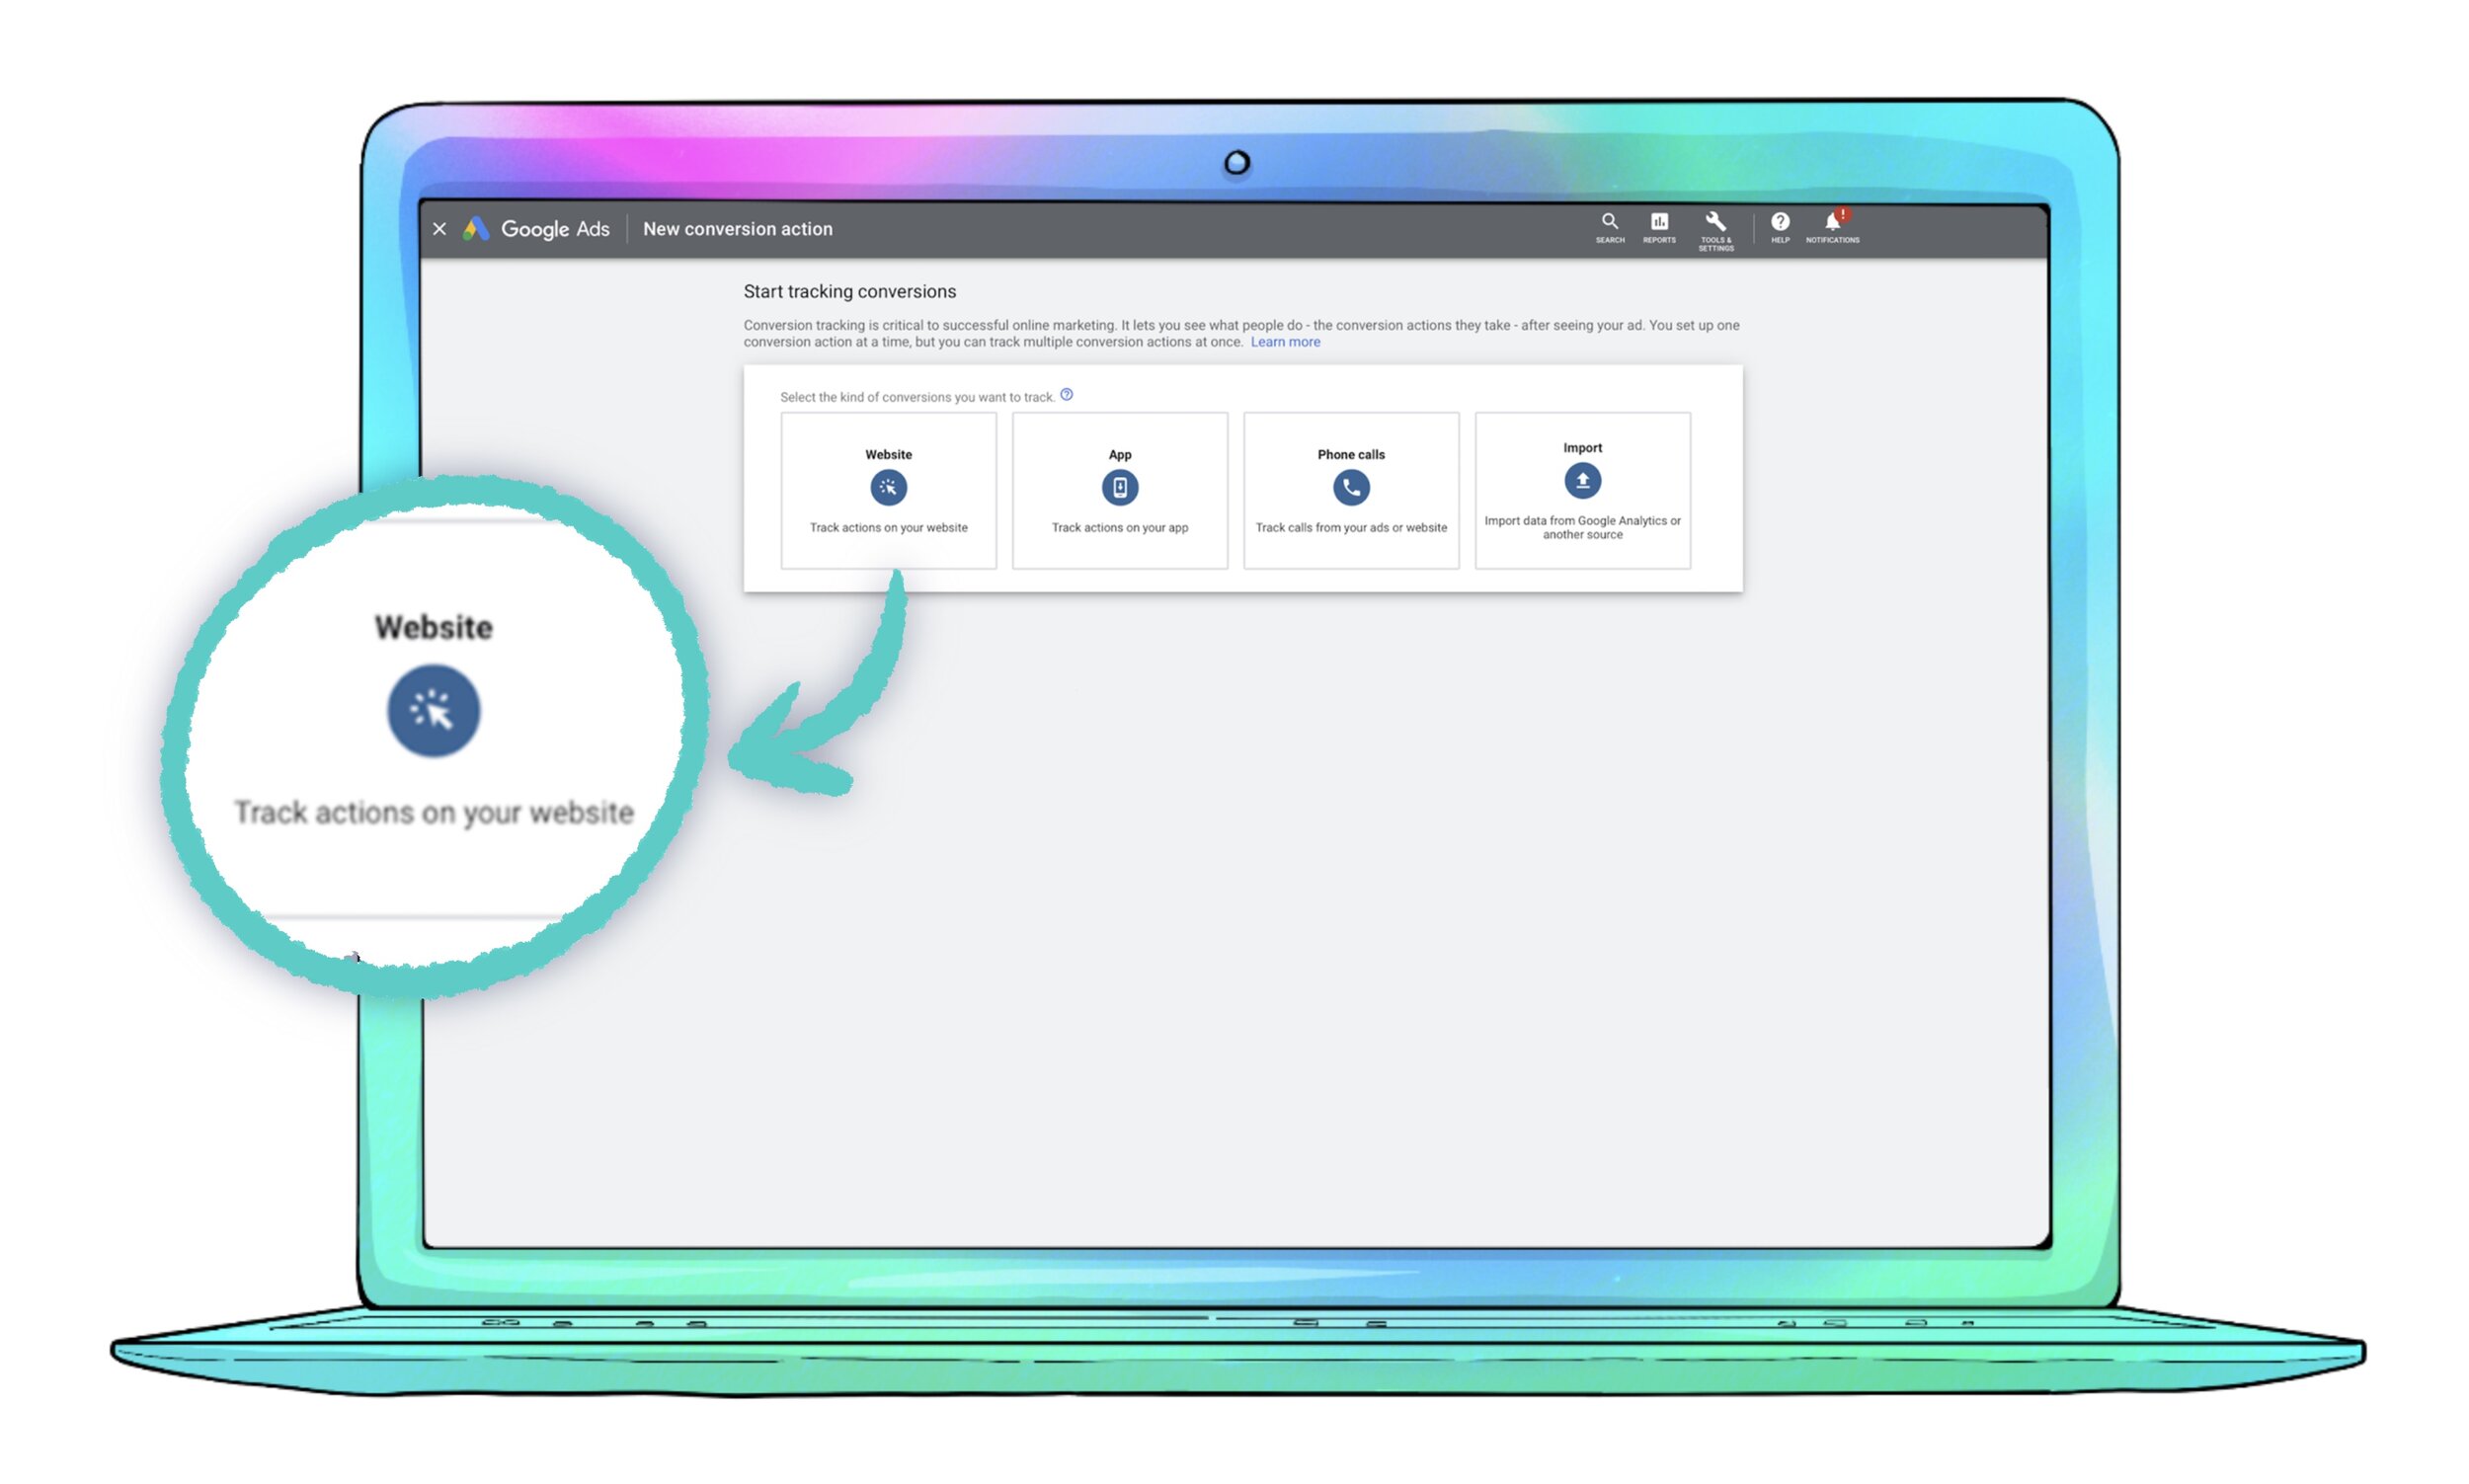
Select the Website option to track visitor’s activities on your Promo Page.
STEP 4

Under the Category section choose Page View from the dropdown menu and name your conversion.
step 5

In the Value section, select the last option. Under Count, choose One, so Google tracks 1 visit per user that lands on your Promo Page. Once you’re ready, hit Create and Continue.
step 6

To get your Conversion ID code, click on the Use Google Tag Manager option.
step 7

Copy the Conversion ID and click on Next.
Adding and testing the Google Conversion ID on the Promotion Page:
These next steps will help you ensure the tracking pixel properly works and gathers the intended data from visitors that land on your Promotion Page.
Note: To facilitate testing, all processes are made on Google Chrome.
STEP 1

On Google Chrome, install the Google's Tag Assistant
STEP 2

Paste the Conversion ID on the respective field on the Events Promo Page configuration page. Copy your unique URL.
STEP 3

Paste the link on the Google Chrome browser tab and check that, when loading the Promo Page, it triggers the (correct) Google Tag on the Tag Assistant extension.
STEP 4

After confirming that the correct tag is being triggered, it’s important to make sure that Google is also registering views (visitors) to your Promotion Page. To properly test this, you’ll need to load your Promo Page using Incognito mode a couple of times.
step 5

Once you confirm the conversion action registered your activity on the Promo Page, you should see a Recording conversions label next to it.
Note: It might take Google up to 3 hours to count the activity AFTER you’ve visited your page.
Creating a google ads Retargeting Audience
When you’re ready to set up your Google Ads retargeting campaign to re-engage users that have visited your Promo Page and push them a step further, follow these steps:
STEP 1

Navigate to Tools on the upper menu bar and, under Shared Library, click on Audience manager.
STEP 2

Click on the + button to create a new audience list.
STEP 3

Select the option Website Visitors.
STEP 4

Name your audience and, under List members, choose Visitors of a page. Make sure that, in the Visited page section, you have Page URL and contains selected. Paste your Promo Page URL.
STEP 5

Define the rest of your audience’s details and, when set, click on Create Audience.